
- My Account Settings
- Overview
- Basic Settings
- Change Password
- External Service Login Coordination
- Setting External Service Login
- Unconfiguring External Service Login Coordination
- MFA Settings
- Configuring an authentication application
- Deleting the authenticator application settings
- Device Login Setting
- Device Account Link Settings
- Specifying a PIN Code
- Groups User Belongs to
- Login History
My Account Settings
You can access this function from User Menu under User Mode.
Overview
My Account Settings allows you to perform the following:
| Item | Description |
|---|---|
| Basic Settings |
You can check your own information. You can also modify your name, and change the language of automatic emails sent. |
| Change Password | You can change your account password. |
| External Service Login Coordination | You can configure the coordination with an external service for logging in this site. |
| MFA Settings | Configure an authenticator application when MFA is enabled. |
| Device Login Setting |
You can check and cancel the status of the Device Account Link Settings for each device type.
If a multifunction printer/copier is registered to your tenant and if your PIN Code is active in "Login Method on Device" of "Tenant Info", "PIN Code Setting" is displayed and you can specify a PIN code. |
| Groups User Belongs to | Shows the group(s) to which the logged-in user belongs. |
| Login History | Displays the login history for the users currently logged in |

- The Device Account Link Settings is displayed when a device (multifunction printer/copier, RICOH Interactive Whiteboard, or RICOH Collaboration Board) is registered in the logged in tenant.
Basic Settings
You can check your own information.

| Item | Description |
|---|---|
| User ID | Shows the user ID of the currently logged-in user |
| Email Address | Shows the registered email address of the currently logged-in user |
| First/family name |
Shows the last and first names of the currently logged-in user. You can use the following
characters:
|
| Department | Shows the department name for the currently logged-in user |
| Office Location | Shows the location of the currently logged-in user's office |
| Reply Email Language | You can select the language for the reply email from this system among by a drop-down list. |
| User Optional Information 1 to 15 |
Shows user optional information specified by the tenant administrator This is displayed when the user optional information or its item name is specified. |
Change Password
The login password of the currently logged-in user can be changed.

 Enter the current password in "Current Password".
 Enter a new password in "New Password".
Click "Password Policy" to display the password policies. Enter a new password according to the password policies.
 In "New Password (Confirm)", enter the same password as
that entered in Step 2.
In "New Password (Confirm)", enter the same password as
that entered in Step 2.
 Click [Save].
External Service Login Coordination
You can configure the external service integration for login to General Setting Management.
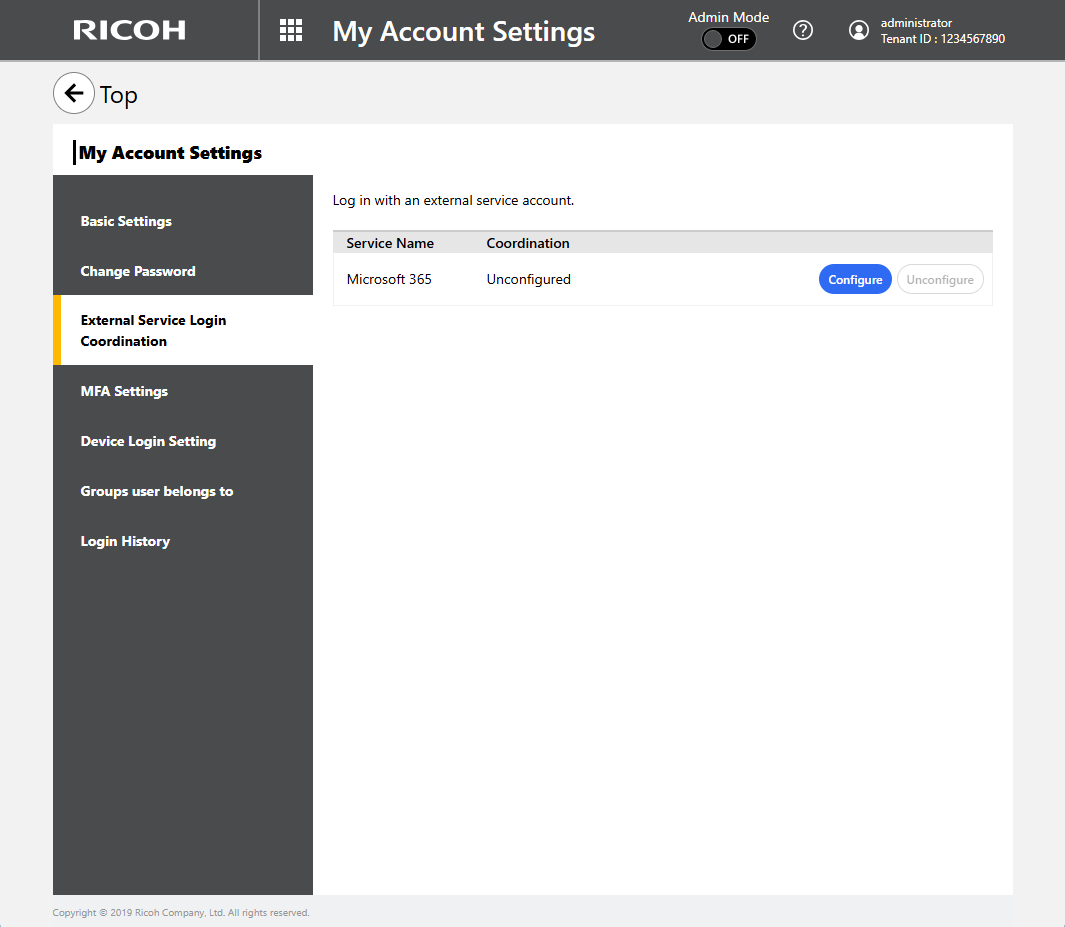
Setting External Service Login
If Microsoft 365 Coordination is disabled for a service, its "Coordination" column shows "Unconfigured". Click [Configure].
When "Need Admin Approval" screen appears after setting External Service Login, contact a Microsoft Entra ID global administrator for approval.
Unconfiguring External Service Login Coordination
If External Service Login Coordination is enabled for a service, its "Coordination" column shows "Configured". Click [Unconfigured].
MFA Settings
When MFA is enabled, configure the authentication application to be used by the user. Before configuration, the authentication application needs to be installed on the device used.
-
Supported authentication applications:
Those supporting a RFC6238-compliant TOTP (time-based one-time password) algorithm that can generate a six-digit confirmation code
-
Operation-verified authentication applications:

Configuring an authentication application
Click [Setting] for "Authenticator application".
Scan the 2D barcode on the device where the
authentication application is installed.
Alternatively, you can copy and enter the secret key into the authentication application. To do so, click [Show Secret Key] to display the secret key, and then copy and enter the key into the authentication application.

Enter the confirmation code displayed in the
authentication application into "Confirmation Code".
Click [OK].Deleting the authenticator application settings
Click [Delete] for "Authenticator application".

Read the message displayed on the confirmation screen,
and then click [OK].

Device Login Setting
You can check and cancel the status of the Device Account Link Settings for each device type.

Device Account Link Settings
-
Multifunction Printers/Copiers
This item is displayed only when a multifunction printer/copier is registered in the currently logged-in tenant. Clicking this item opens another section.
Item Description Device Account Shows the multifunction printer/copier login user ID for Device Login Coordination, along with its current coordination status; if coordination is enabled, clicking [Unconfigured] disables the coordination. Card Shows the user ID and the description for the IC card login for Device Login Coordination with the multifunction printer/copier, along with the current coordination status. if coordination is enabled, clicking [Unconfigured] disables the coordination. You will see up to three IC cards that are currently being coordinated. You can change the description by clicking [Change]. -
Interactive Whiteboard
This item is displayed only when a RICOH Interactive Whiteboard is registered in the currently logged-in tenant. Clicking this item opens another section.
Item Description Device Account Shows the RICOH Interactive Whiteboard login user ID for Device Login Coordination, along with its current coordination status; if coordination is enabled, clicking [Unconfigured] disables the coordination. Card Shows the IC card login user ID for Device Login Coordination with RICOH Interactive Whiteboard, along with its coordination status; if coordination is enabled, clicking [Unconfigured] disables the coordination. -
RICOH Collaboration Board
This item is displayed only when a RICOH Collaboration Board is registered in the currently logged-in tenant. Clicking this item opens another section.
Item Description Device Account Shows the RICOH Collaboration Board login user ID for Device Login Coordination, along with its current coordination status; if coordination is enabled, clicking [Unconfigured] disables the coordination. Card Shows the IC card login user ID for Device Login Coordination with RICOH Collaboration Board, along with its coordination status; if coordination is enabled, clicking [Unconfigured] disables the coordination.
Specifying a PIN Code
In this section, specify whether to use a PIN code to log in and the number for logging in with the PIN code.
There are two methods to specify a PIN code: a method in which the user enters a PIN code and a method that automatically issues a PIN code by email. Which method is displayed depends on the settings of "Login Method on Device" in "Tenant Info".
In PIN Code Setting, click [Change].
Select [Login with PIN] or [No].
-
If you select [Login with PIN], enter a new PIN code. Specifiable Characters for PIN Code Setting
If you select [No], the specified PIN code is deleted.
Click [OK].In PIN Code Setting, click [Change].
Select [Login with PIN] or [No].
-
If you select [Login with PIN], a new PIN code is issued by PIN issuance email.
If you select [No], the specified PIN code is deleted.
Click [OK].In "PIN Settings", click [Confirm].
If you have a password specified, proceed to step 2. Otherwise, proceed to step 3.
Perform either of the following steps:
-
"Enter the password to confirm the PIN"
When you enter your password and click [OK], you will see your PIN.
-
"Send an email to confirm the PIN"
When you click [OK], you will receive an PIN Confirmation Email sent to your registered email address that contains your PIN code.
When you click [OK], you will receive an email sent to
your registered email address that contains your PIN code.
Groups User Belongs to
Shows the group(s) to which the logged-in user belongs.

Login History
Displays up to the past 35 days of the login history for the users currently logged in.
